IN-Screenshot Free Addin for Autodesk Inventor

This post is for all Autodesk Inventor Users. How many times have you felt the need to take a screenshot of your Inventor file (assembly, part, drawing etc) and send it across to people who do not have Inventor or even upload the image online. You would have to follow one of the following two options

Option A: File > Save As> Save Copy As> and then select .jpg or .png as extension and save the file.

Option B: Use “Print Screen” key on your keyboard, go to MS Paint or other image editing software, paste the copied image and then save it.

At AR-CAD, we have developed a simple addin for Autodesk Inventor which lets you take screenshot or capture the current view of Inventor and save it as a jpg / png / gif or bmp image. And the best part about this addin is that its for FREE !!!. The addin developed is pretty simple and we just wanted to help Inventor users. We have developed the addin using Visual C#. Below images show an overview of IN-Screenshot usage in Inventor 2009 and Inventor 2010 (which has a Ribbon User Interface). To know more details and download IN-Screenshot addin, check out AR-CAD website.

It presently works on Inventor 2009 and 2010 versions and should also be able work on 2011, when it would be released. We have tested it to work on both 32 and 64 bit OS of Windows XP, Windows Vista and Windows 7.

You are free to try the addin and let us know your valuable feedback.

Disclaimer: Some days ago, I had come across a blog post pointing to ADN Addin of the month being awarded to a similar Inventor addin which saves the active view as an image. I had developed IN-Screenshot atleast an year ago and have no link with the other addin.

IN-Motion Released for Autodesk Inventor 2010

We have released IN-Motion for Autodesk Inventor 2010. IN-Motion is an affordable Motion and Dynamic Simulator for Autodesk Inventor. We had launched IN-Motion for 2009 version of Inventor earlier this year. Autodesk has certified IN-Motion to work with Inventor 2009 and 2010. We are also developing for 2011 version and would be available soon after Autodesk launches its product line for 2011 versions. For a detailed info on IN-Motion, check out IN-Motion 2009 blog entry. Download IN-Motion with 30 days free trial and once you are satisfied with it, you can buy a license for lifetime at just US$ 200.

A screenshot of IN-Motion running on Autodesk Inventor 2010 is below.

Please keep checking this blog for more updates and tutorials on IN-Motion and also Dynamic Simulation using Autodesk Inventor. If you have any query, please email to the following

Aik-Siong Koh (askoh@askoh.com) and Rajeev Lochan (rajeev@ar-cad.com)

Happy IN-Motioning :)

IN-Motion Launched for Autodesk Inventor 2009

Update: IN-Motion Released and Certified for Autodesk Inventor 2010.

Yes !! Finally we made it. After the extensive development of IN-Motion, we have launched it for Autodesk Inventor 2009. View Full Press Release. Download IN-Motion with 30 free trials

IN-Motion is an inexpensive Motion and Dynamic Simulation Addin for Autodesk Inventor. It has been certified by Autodesk to work with Autodesk Inventor 2009 version. We are in the process of developing IN-Motion for Autodesk Inventor 2010 and it should be released soonIN-Motion Released and Certified for Autodesk Inventor 2010 .

Check out the video below to get an overview of IN-Motion.

The Main Features of IN-Motion are:

IN-Motion is packed with all the above mentioned features and is available for download with 30 free trials. Once you are satisfied with our Addin, you can buy a lifetime license for just US$ 200.

If you are an Autodesk Inventor user and wanted to learn Dynamic Simulation, we have free online video tutorials at http://www.ar-cad.com/in-motion/tutorials/index.html

Please keep checking this blog for more updates and tutorials on IN-Motion and also Dynamic Simulation using Autodesk Inventor. If you have any query, please email to the following

Aik-Siong Koh (askoh@askoh.com) and Rajeev Lochan (rajeev@ar-cad.com)

Happy IN-Motioning 🙂

Update: IN-Motion Released and Certified for Autodesk Inventor 2010.

Develop Autodesk Inventor Addin Using C# – Part 5


Watch High Resolution Video at AR-CAD

Summary: How to Add extra buttons to already existing Addin Command Bar.

This is in continuation of my earlier posts on Developing Inventor Addins using C# Part1, Part2, Part3 and Part4. In our last screencast, I had explained how to replicate assembly tree view inside our addin command dialog. We go a step further and interact with the opened Assembly document / file.

In this ScreenCast, we mainly deal with How to add another button to our existing addin command bar. By clicking on that button, a form would show up. We use SelectSet method of Inventor to capture user Selections. In screencasts to follow, we would try to explore how InteractionEvents can be used in place of SelectSet.

Upon selecting an ocurrence (Part/ Sub-assembly), the label in our Form is changed to its Display Name. Its not a big deal though, but atleast we are heading in the right direction.

Would love to hear any feedback in the form of comments.

Develop Autodesk Inventor Addin using C# – Part 4


Watch High Resolution Video on AR-CAD

This is in continuation of my earlier posts on Developing Addins for Autodesk Inventor using C# Part1, Part2 and Part3. In this screencast, I have introduced a TreeView component in our Custom Form, which gets displayed upon clicking on our Addin Button. I have also introduced concept of ImageList briefly and how it was coupled together with our TreeView.

We also added a new set of methods/ functions in AssemblyTreeCmdDlg.cs file. The major part of the code has been taken from AssemblyTree Apprentice Server example, that gets shipped with Inventor SDK.

Upon clicking on Submit button (on our Form), Inventor quickly produces a TreeView with all the Parts, Sub-Assemblies in the active assembly file, and also shows the Constraints that each of these parts / sub-assemblies have.

Develop Autodesk Inventor Addin using C# – Part 3


Watch High Resolution Video on AR-CAD

This post is in continuation of my earlier posts on Developing Addins for Inventor using C# part1 and part2. In this screencast / video tutorial, we go a step forward and show a Form / Command Dialog when our Custom Button is clicked in Inventor. The form created is very much basic. Ideally the form should minimize along with Inventor if Inventor is minimized. That part is not taken care of in this screencast. It would be done in coming tutorials.

When our Custom Button is clicked (OnExecute), a form is displayed with a label and a Submit Button. Upon clicking Submit Button, the file name of the active document (opened file) is retrieved from Inventor Application object and updated in the Form.

Debugging Autodesk Inventor Addin using Visual Studio


Watch High Resolution video on AR-CAD

If you have followed my earlier screen casts on Developing Inventor Addin using C# (Visual Studio) here and here, I had not touched anything on How to debug an Addin using Visual Studio. When you build / register an Addin, a DLL (Dynamic Link Library) file is created which Inventor identifies as an Addin. To be able to debug an Addin, you have to step into Inventor Process. This can be done as follows.

If you are using a free version of Microsoft Visual Basic (Express Edition), it does not have a debugging option for COM objects out of the box. This can be done with the following work around / trick

  • Create a file with a name <yourAddinDllName>.csproj.user (In my case, it is AR-CADInventorAddIn4.csproj.user
  • Put the following content into this file (The only thing that could probably change is the location of your Inventor.exe file)

<Project xmlns=”http://schemas.microsoft.com/developer/msbuild/2003″>

<PropertyGroup Condition=” ‘$(Configuration)|$(Platform)’ == ‘Debug|AnyCPU’ “>

<StartAction>Program</StartAction>

<StartProgram>C:Program FilesAutodeskInventor 2008BinInventor.exe</StartProgram>

</PropertyGroup>

<PropertyGroup>

<ProjectView>ShowAllFiles</ProjectView>

</PropertyGroup>

</Project>

  • Close the solution and open it again. By doing this, the .csproj.user file is associated with the project.
  • Insert a “Break Point” in your code and Start Debugging by hitting F5 key.
  • Now Inventor gets started and you are halted at the break point. Use Step Through and Step Into to inspect different objects, by hovering the mouse over the objects.
  • When you are done with Debugging, your addin would load up and hence Inventor is loaded completely. You can also insert break points when you click on a Custom Button , your addin has created when the Inventor is loaded completely.

If you happen to have a Visual Studio Professional version, there is no need to create the .csproj.user file, you can follow these instructions to get the debugger working.

  • Right Click on your addin project. Go to its properties.
  • Go to Debug Tab listed in the left side of this dialog.
  • Set Configuration = Debug , Platform = Any CPU
  • Set Start External Program to the location pointing to Inventor.exe
  • Close the properties Dialog box
  • In the Solutions Explorer, click on an icon “Show All Files”
  • Carry on with your debugging session as explained above and also in the screencast

I hope things are pretty much clear, if there are any queries, I would love to hear them in the form of comments.

Develop Autodesk Inventor Addin using C# – Part 2

Part 2a:

Watch High Resolution video of Part2a videos on AR-CAD


Part 2b:


Watch High Resolution video of Part2b videos on AR-CAD


Part 2c:


Watch High Resolution video of Part2c videos on AR-CAD


This video tutorial is in continuation of my earlier post on Developing Autodesk Inventor Addin using C# – part 1. In this session, we go a step further and create Command Button(s), that is added into a Custom Command Bar, which in turn gets added into Panel Bar of Assembly Files.


We start with a project that gets formed when we use Inventor Addins Template for C# language. We then add a couple of references and use most of the code from SimpleAddin that gets shipped along with Inventor in its SDK kit. We use the Button class from SimpleAddin as it is, and then append code to StandardAddInServer.cs file as explained in the video.

Some of the main points discussed in the video are as follows:

  1. How to deal with User Interface Event
  2. How to deal with Event Handler for Command Bars and Environments on Reset
  3. How to use ‘try & catch’ loop to handle errors effectively
  4. How to extend Button base class. Each ButtonCommand (AssemblyTreeButton) will have a Class which implements Button class
  5. How to load Image icons (.ico) for User Interface items
  6. How to create Buttons (CommandButtons)
  7. How to create Command Category
  8. How to add Button to Command Category
  9. How to create a custom command bar (toolbar), only the first time the addin loads up
  10. How to add a custom command bar to an available Environment (again only first time)
  11. How to Restore CommandBars and Environments and clean up the custom CommandBars and Environment changes done by activate method
  12. How to run a command when a button is clicked
  13. How to Build a Solution from Visual Studio 2005
  14. How to register and unregister an Addin using RegAsm.exe (easier way)
  15. How to check whether you addin has been loaded in the Inventor when it is started

I hope a lot of basics of a Command Button are covered in this video tutorial. In the coming ones, I would try to work on “Debugging an Addin from Visual Studio” and more complex addins which actually do something other than just showing some messages.

Please comment below if there is anything that is not clear. To view high resolution Videos of the above screencasts, check them out at AR-CAD at part2a, part2b, part2c.

Update: Looks like the install.bat and uninstall.bat files content are not very clear in the video, here are they in text

Install.bat

@echo off

C:WINDOWSMicrosoft.NETFrameworkv2.0.50727RegAsm.exe /codebase AR-CADInventorAddIn4.dll

PAUSE

Uninstall.bat

@echo off

C:WINDOWSMicrosoft.NETFrameworkv2.0.50727RegAsm.exe /unregister AR-CADInventorAddIn4.dll

PAUSE

Develop Autodesk Inventor Addin using C# – Part 1

Part 1a

Part 1b

Watch High Resolution video of both above videos on AR-CAD

I hope you have gone through my earlier video tutorial and post, as they provide a good (if not great) foundation for basic concepts of Autodesk Inventor API and how it Inventor can be customized using Visual C#. In the previous posts, we had connected to Inventor as an external exe file, which runs out 0f process with respect to Inventor and hence can be considered slow. To make the addins work faster and to give the end user a better work-flow and experience, we have to make an addin which is internal to Inventor and which runs in-process with respect to Inventor.

In the above videos ( they have been broken into part 1a and 1b as youtube couldn’t upload the whole video, which is 12 mins long), basic introduction is given to “How to develop an addin to Inventor using C#”. Please go through it and I hope the explanation in it is good enough to get you started. In Next versions of this tutorial, I shall try to increase the complexities. If there are any doubts/ clarifications / suggestions, I would love to hear from you as comments to this post. Watch High Resolution video of both above videos on AR-CAD

Customize Autodesk Inventor API using C# – Part 3

In continuation to my previous post on Customizing Inventor using C#, I go a step further and interact with an opened Assembly through API. I have ported the code from VBA to C# for the example explained in Introduction to Inventor API and VBA (Visual Basic for Applications). The attached document is from Autodesk University of 2003.

Start a new C# Windows Application project in Visual Studio 2005, as done in previous tutorial. Design the form as shown in the image to the left. Double clicking on Hide / Show will take you to Form1.cs in the Code Viewer window and add/append the following code into it. Please note that I have changed the Names/Identifiers of form elements to txtSearchName , cmdShow, cmdHide as explained in the above tutorial document.

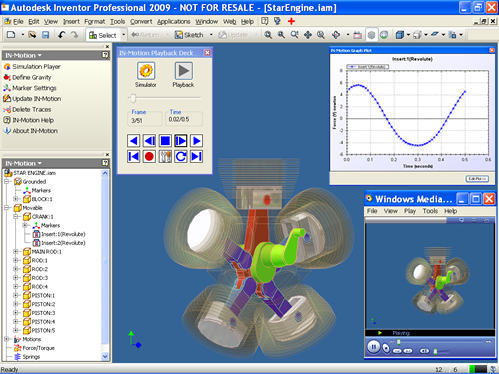
In this example, when you hit ‘F5’ or Debug, a windows form appears as shown. Type a part name in the Search Field and hit “Hide”. If any part(s) exist in the opened assembly with that name, it/they would be made invisible. If its hidden and you hit on “Show”, the part would be made visible. In our case, we have made Piston part invisible in the engine assembly that ships with Inventor as an example assembly. Save the application by File> Save All in Visual Studio.

You can also use this Windows Application by executing the .exe file that is produced, when you debug/build your application. In my case, its at My DocumentsVisual Studio 2005ProjectsWindowsApplication1WindowsApplication1binDebugWindowsApplication1.exe . Double clicking on the exe file would also popup the Form that was developed.

Form1.cs code

[sourcecode language=’c#’]
using System;
using System.Collections.Generic;
using System.ComponentModel;
using System.Data;
using System.Drawing;
using System.Text;
using System.Windows.Forms;

namespace WindowsApplication1
{
public partial class Form1 : Form
{
//Instantiate a variable with Inventor.Application object.
//It should have a scope throughout this Class
private Inventor.Application oApp=(Inventor.Application)System.Runtime.
InteropServices.Marshal.GetActiveObject(“Inventor.Application”);

//Declare oAsmDoc to have a scope within this Class
private Inventor.AssemblyDocument oAsmDoc;
public Form1()
{
InitializeComponent();

//Check that a document is open
if (oApp.Documents.Count == 0)
{
MessageBox.Show(“An Assembly must be active”);

}
//Check that an assembly document is active
if (oApp.ActiveDocument.DocumentType !=
Inventor.DocumentTypeEnum.kAssemblyDocumentObject)
{
MessageBox.Show(“As Assembly document must be active”);

}
//First Type Cast ActiveDocument into AssemblyDocument
//Set a reference to the active document
oAsmDoc = (Inventor.AssemblyDocument) oApp.ActiveDocument;
}

private void cmdHide_Click(object sender, EventArgs e)
{
//Call the function that traverses the assembly
// and sets the visibility.
SetVisibility(oAsmDoc.ComponentDefinition.Occurrences,
txtSearchName.Text, false);

//Update the View.
oApp.ActiveView.Update();
}

private void cmdShow_Click(object sender, EventArgs e)
{
//Call the function that traverses the assembly
// and sets the visibility.
SetVisibility(oAsmDoc.ComponentDefinition.Occurrences,
txtSearchName.Text, true);

//Update the View.
oApp.ActiveView.Update();
}

private static void SetVisibility
(Inventor.ComponentOccurrences Occurences, string SearchName,
bool VisibilityOn)
{
//Iterate through each of the occurences
//in the collection provided.
foreach (Inventor.ComponentOccurrence oOccurence in Occurences)
{//Check to see if the occurence name matches the search name
//The strings are converted to lower case
// to remove context sensitivity.
if(oOccurence.Name.ToLower().Contains(SearchName.ToLower()))
{//Check to see if the visibility is different than the specified
if (oOccurence.Visible != VisibilityOn)
{//Set the Visibility of the occurence.
oOccurence.Visible = VisibilityOn;
}
}
}
}
}
}
[/sourcecode]